
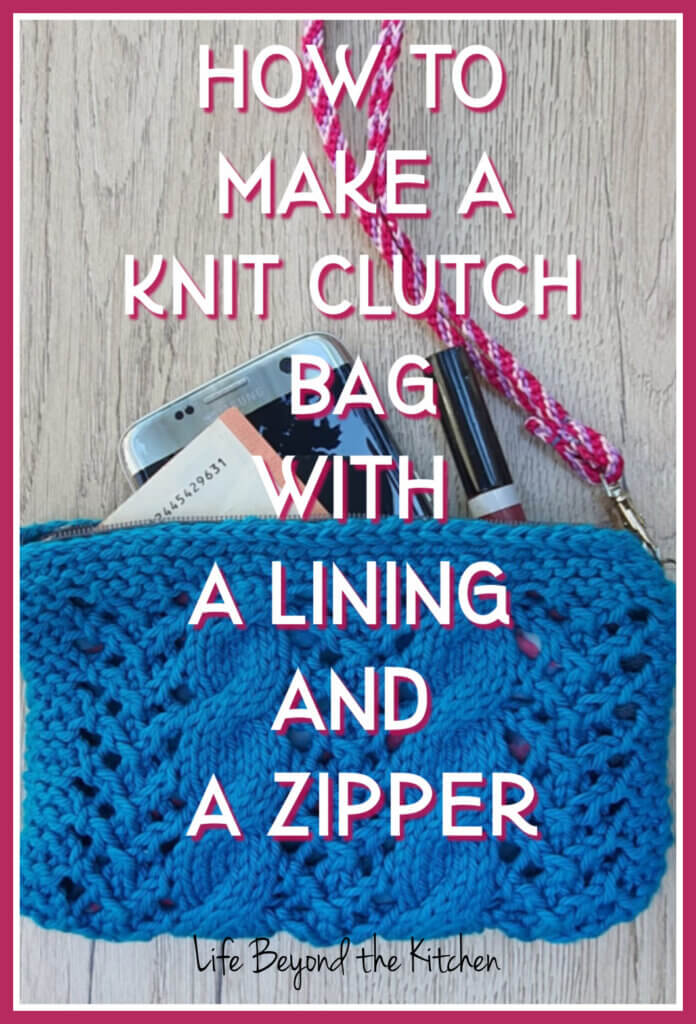
How to make a knit clutch with a zipper
Last Updated on October 21, 2020 by lydiaf1963
I love little bags. They’re the perfect size for a quick trip to the store or an evening out. They’re also great to pop inside a tote bag or large purse to keep everything organized. To make this knit clutch bag I paired a kumihimo braid and a knitted washcloth pattern to make a wristlet style pouch just large enough for my phone and a few other essentials.
Materials List
Strap
- kumihimo plate
- threads
- 10 mm jump ring
- large swivel clasp
Clutch
- yarn
- appropriate sized knitting needles or crochet hook
- fabric for lining
- zipper
- needle and thread
- scissors
- ruler or tape measure
Cables, Lace and Kumihimo
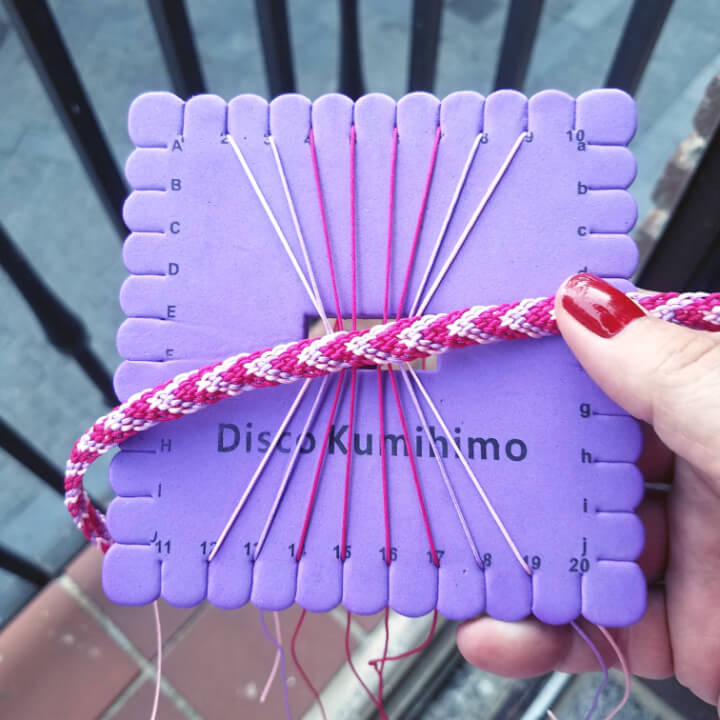
I’ve been doing a lot of round kumihimo braids lately. In order to examine the techniques for making flat braids I started a flat chevron kumihimo braid demonstrated in this video pin from CSL Designs. The finished braid seemed the right size to make a strap for the knit clutch I’ve had on the back burner for who knows how long.
The next step was to choose a pattern for the bag. It can be anything that catches your fancy (even crochet, if you prefer!) I liked the idea of combining cables and lace, but didn’t want to go to the trouble of designing my own, so I searched for knit dishcloth patterns.
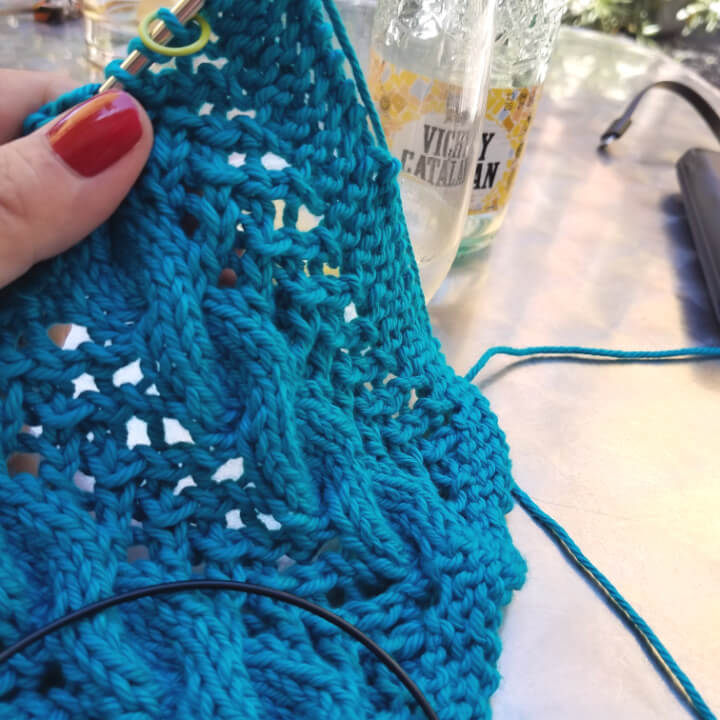
The cables and lace dishcloth from Willow yarns fit the bill with a simple arrowhead lace paired with a 3×3 right cross cable. The next step was to work up a swatch with a turquoise cotton/acrylic blend yarn from my stash. The original pattern has an 11 stitch repeat with edging stitches. After working up a swatch, I could tell I needed to drop a repeat or the bag would be too wide. I also decided to add a slipped selvage stitch to make it easy to seam.
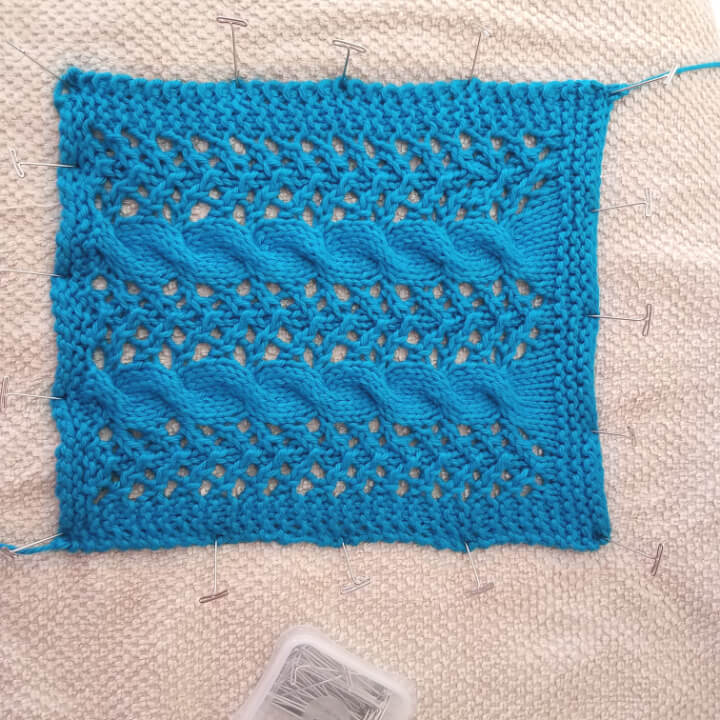
It was not a hardship to sit in the shade with an ice cold beverage while I knit my project. After casting off, the block was washed and pinned flat to dry.
Assembling the bag
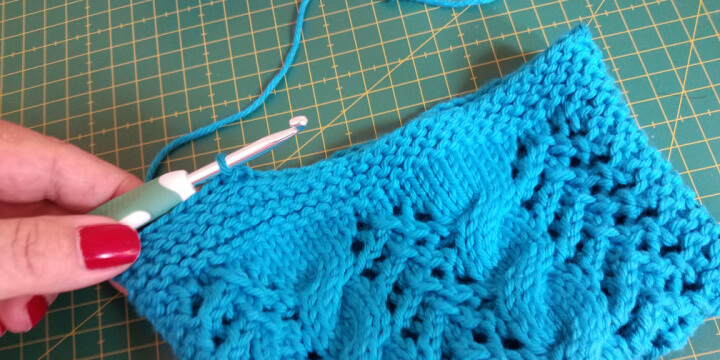
Instead of seaming the sides with yarn, I crocheted them together using a slip stitch. I also slip stitched around what would be the top opening. You can see in the photo of the finished block that the cast off edge is fairly straight, but the cast on side is wavy due to the tension differences between the lace and the cables.
Slip stitching not only gave a nice firm edge, it also functioned as a sewing guide for attaching the zipper and lining.
Attaching the zipper
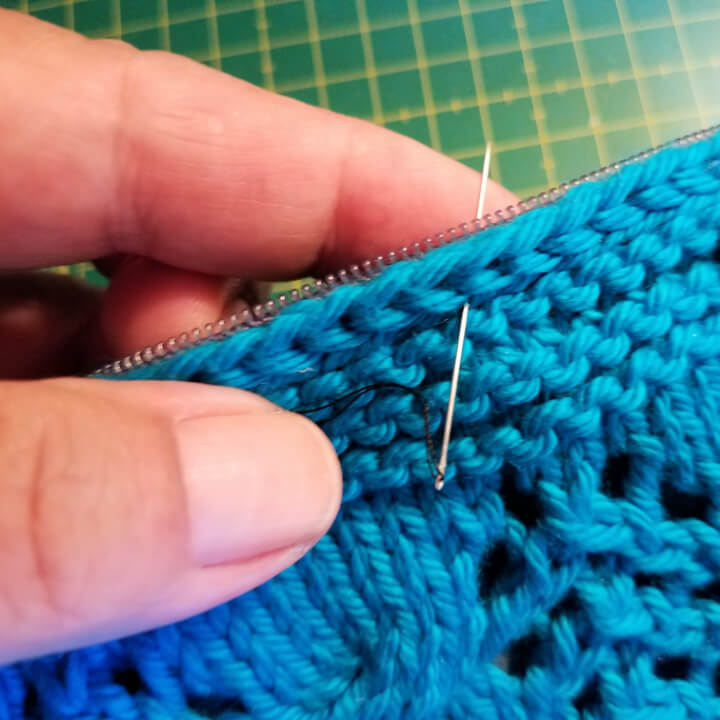
Attaching the zipper by hand was very easy; easier than some pouches I’ve made on a sewing machine, to be honest. You line up the ends of the zipper with the sides, and the zipper teeth with the slip stitch edge. Then neatly hand stitch through the tapes to the knit stitches using a matching thread. I doubled my thread to make it sturdier.
After the first stitches are tacked in, you’ll want to open the zipper to make it easier to sew. If your zipper is longer than the opening, tuck the excess to the side. It will be covered by the lining.
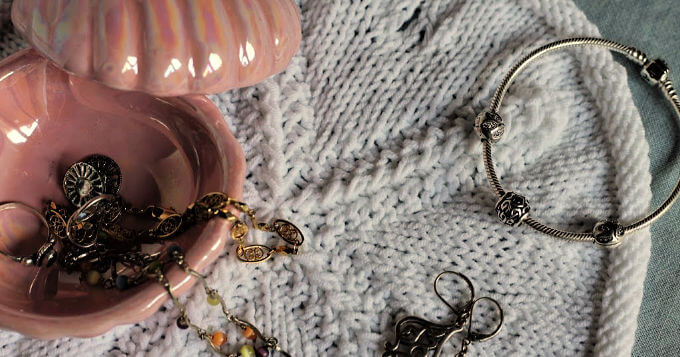
Making the lining
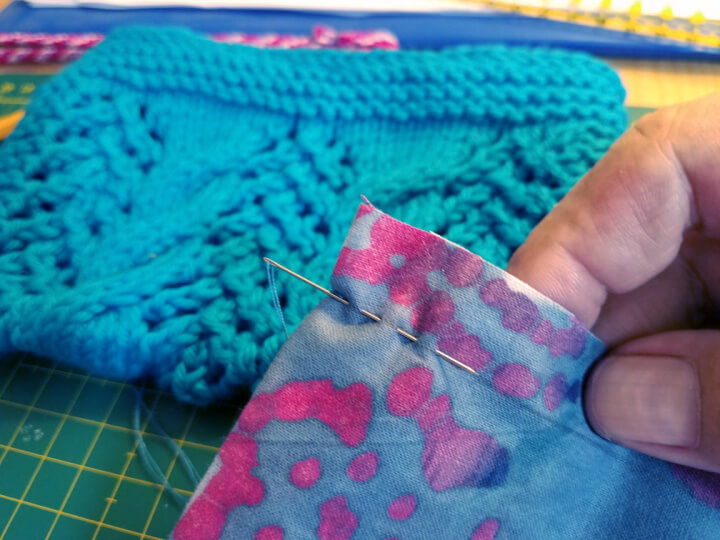
To make the lining, choose a fabric and use your pouch to estimate the size to cut the fabric. I added an inch and a half to the width to account for the seam allowance. For the depth, double the height of the bag and add an inch or more.
Sew the lining by putting the side you want seen when you open the bag together. Use a running stitch to create the side seams. Insert the lining into the bag and fold down the opening to create a neat edge to whip stitch to the zipper tape.
Loops And Love Crochet’s pin shows how to add a lining to a small pouch. The idea is the same whether the pouch is knit or crocheted.
Assembling the strap

The final step was to assemble and attach the strap. I used a strap from another bag to help sew my kumihimo braid into a strap. (I did mention little bags are a weakness, didn’t I?) A dollop of glue will keep the raw edge from fraying.
The strap is attached to the bag via a 10mm jump ring inserted on the side. In retrospect I should have inserted the jump ring and added a couple reinforcement stitches before adding the lining but so far, so good.
Taking my knit clutch for a test drive
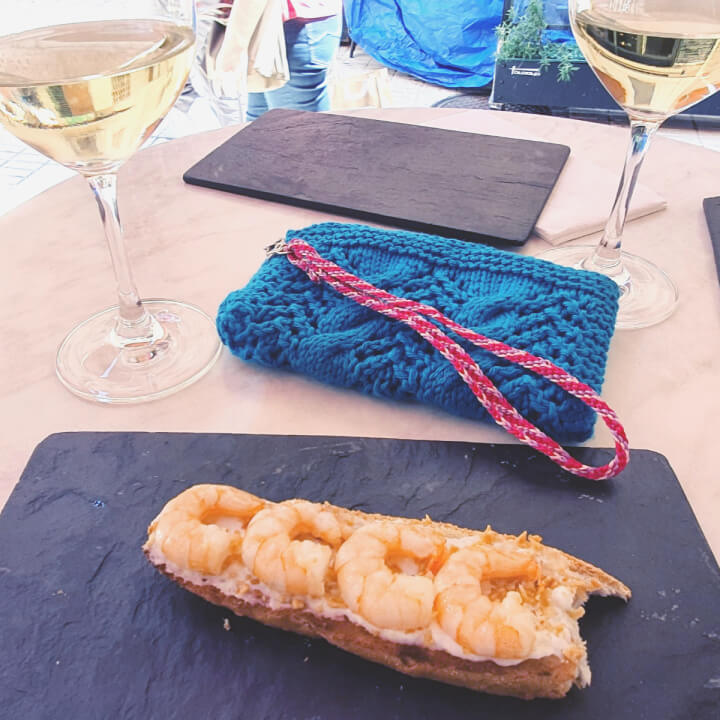
Once everything was assembled, it was time to test out my new knit clutch. Of course we took it out for tapas. The pouch was easy to carry and the perfect size to set on the table. My normal bag is too large for that, usually I have to hold it in my lap. There was just enough room for my phone, some money, a lipstick and keys to my apartment.
Making a knit clutch is the type of project I really like to do. It’s skill building as my hand sewing could definitely improve. It’s also a skill combining project. Just to make this little wristlet I used knitting, kumihimo and hand sewing. I’m already thinking of a color work patterns that would look great as a pouch. Or maybe a plain stockinette bag with an embroidered pattern? Or a quilted fabric with a strap braided from leather.
The possibilities boggle the mind 🙂 Happy creating!
It’s time for the July Pin Challenge! The purpose of the Pinterest Challenge is to motivate us to not just pin, but to make it happen! We didn’t have a particular theme this month other than to choose an inspiring pin and bring it to life.
Want to join us? The August challenge theme is Fall. Sign up here to participate.
For more Pinterest inspired projects from this month’s Pinterest Challenge hosts, check out the links below ↓

This month’s hosts
My Pinterventures • Cookies Coffee and Crafts
Farm Girl Reformed • Slices of Life • Domestic Deadline
Decorate and More with Tip • Purple Hues and Me
Life Beyond Kitchen • White Arrows Home
Mom Home Guide • My Family Thyme
Sew Crafty Crochet • Once Upon a Time & Happily Ever After• Sum of Their Stories
Now, let’s see what the other hosts have created ⇓⇓


Very pretty and the perfect size for outings. Just think of all the different ones you can make.
How handy and artistic is it to make your very own pretty little bag, Lydia! A lot of different techniques went into making this adorable clutch! Looks like you’ve mastered them all and I’m anxiously awaiting your next creative piece!
I wouldn’t of thought about adding a zipper to anything I knitted or crochet. Your are so talented. Your clutch looks amazing!
That is so cute and so handy! Pinned.
Wow, so talented. I’m amazed at the things that can be made by hand. Your tiny clutch is perfect!
Love how your sweet clutch turned out!
This is such a fabulous multi craft project. Knitting, crochet, sewing, kumihimo braiding, does your repertoire of crafts never end?
I don’t have the knack for drawing, like my daughter and sister, probably just as well. hahaha
This is so cute and useful! You did such a great job!
Such a cute clutch!!! I love the cable and lace stitches, and that yarn color is so pretty!!!