How to Posterize An Image in PicMonkey
Last Updated on June 28, 2018 by lydiaf1963
My son has a very photgenic Siberian Husky, at least when he stays still. He has very pronounced markings and striking, ice blue eyes. Today I thought it would be fun to show you how I transformed a photo of Malachi’s eye into an image with more of a hand drawn poster effect using PicMonkey, a web based photo editor that I use to create graphics for my blogs. You can try out the features for free, but if you want to save your creation you’ll need to subscribe. Plans start at $5.99 a month as of May 2018. Once you learn how to posterize an image in PicMonkey you’ll be able to apply the effects to any photo you like.

You can use any image that has been saved in JPG or PNG format in PicMonkey. Every device which captures photos, from you mobile phone, to a point and shoot camera to the most expensive professional cameras can make a JPG. I recommend saving a copy of the image you’d like to use by renaming it and saving it in a folder you can easily find. In this case, the original image name was something like IMG_3663. I changed the name to MalachiEye and put it in a folder on my desktop. You don’t have to do this, but I find it easier to name it something I’ll recognize and place it in a folder I can easily navigate to.
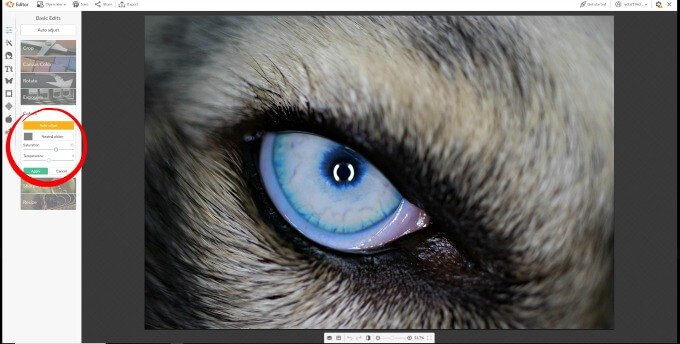
To start, open PicMonkey and select the image you want to edit. You’ll get better results if there’s a lot of contrast in your image. At this point you can perform basic edits to improve the contrast and sharpness of your photo. I also adjusted the color saturation to make Malachi’s eye pop out a little more.
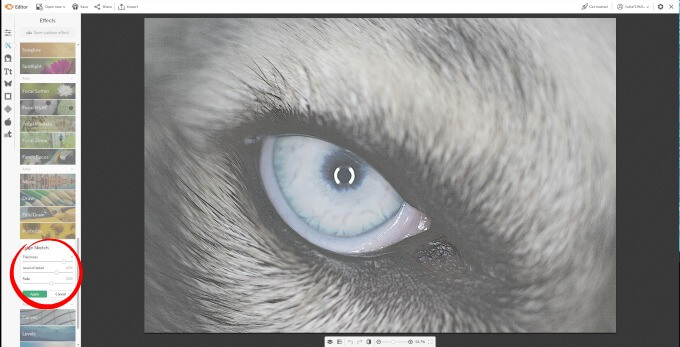
Next, go to the Special Effects tab by clicking the Magic Wand icon. Scroll down to find Edge Sketch. Click to open and use the sliders to trace around the edges of the photo. You can adjust the thickness of the lines and the level of detail. Fade the effect to about 50%. Click Apply to save your changes. The colors will seem faded but we’ll adjust that later.
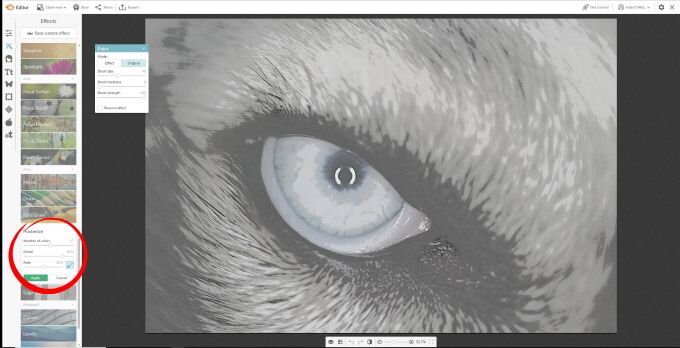
Now click the Posterize button (it’s right about Edge Sketch). You’ll want to set the number of colors to at least 16. Adjust the Detail slider until you’re satisfied with the look then, as before, fade the effect to about 50%. Click Apply to lock in your changes.
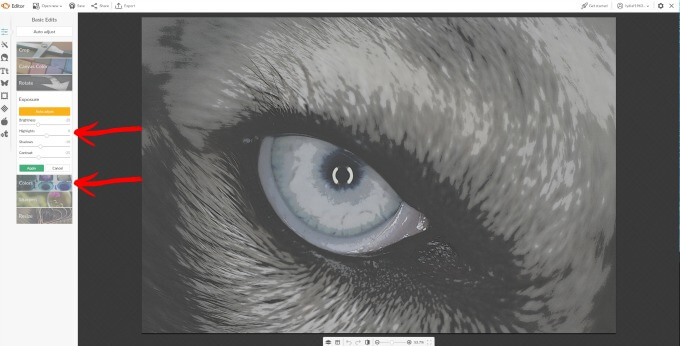
Go back to the Basic Edits tab by clicking the Slider icon at the top. Here you can adjust the Exposure and Color levels to bring back some of the colors and detail.

Here’s what Malachi’s Eye looked after following the steps described above. It wasn’t difficult at all! Since I liked it, I clicked the Export button and renamed the image MalachiEyeSketch so I could find it again easily.
Later on, I decided I wanted to make his eye a little more blue. Rather than go through the entire process again, I opened the MalachiEyeSketch image and kept working from there. Here’s how I adjusted just the color of just the eye.
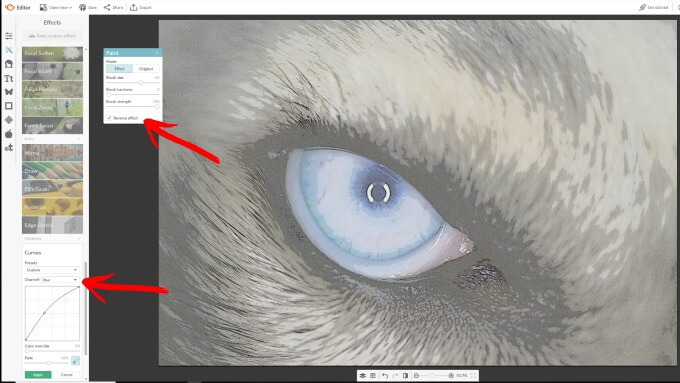
Click on the Magic Wand to open the Special Effects tab and scroll down to the Curves button. This tool allows you to fine tune the colors in your image. Since I want to work with the blues, I click the arrow in the Channels box and select blue. Click on the curve and pull it until you get the color you want. The entire image will change colors, but don’t worry, we’re going to fix that. You’ll notice another dialog box titled Paint has popped up. If you drag your mouse over the image you’ll see a circle that functions like a brush (it’s not showing up in the screen grab.) Adjust the brush size to something manageable and then hold down the left mouse button while you drag the brush over the iris of the eye. You’ll be able to see your changes as you do this. Now click the Reverse Effect box to apply the color change to only the portion you’ve selected.
Again, I saved the image with a new name, MalachiEyeSketchBlue. Here’s the final result:
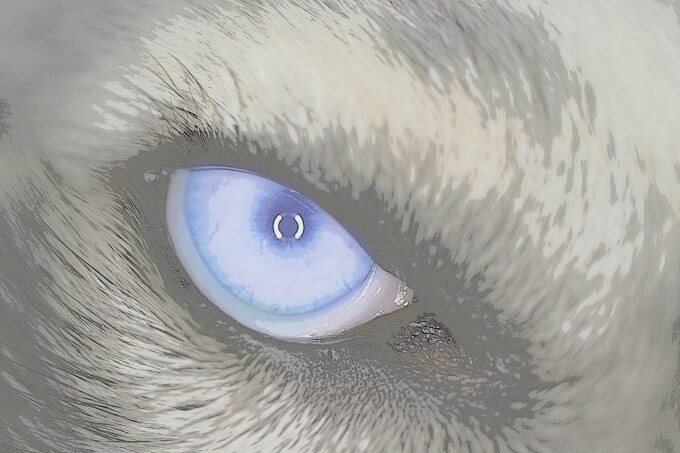
It has a totally different feel from the original image.
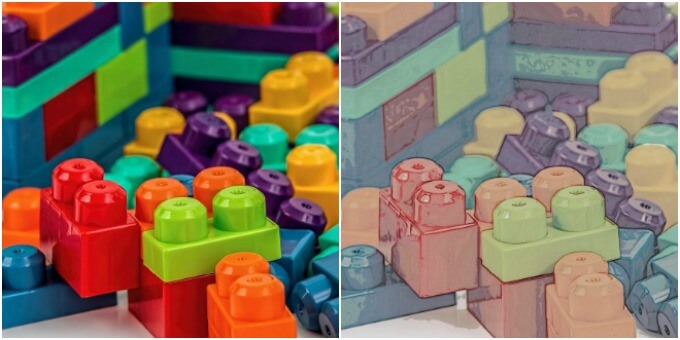
Here’s a before and after using an image with higher contrast. It’s just a matter of trying different things until you get an effect you like.
Have fun using PicMonkey to create graphics for all sorts of projects, from social media to school reports.

This post is part of a Photography Challenge hosted by the Creative Craft Bloggers Group.
Al Things Beautiful – How to Make Photo Magnets!
Try It – Like It – What Photo Editing Software is Right for You?