How to make a chevron braid
Last Updated on August 6, 2020 by lydiaf1963
The inspiration to make this attractive chevron braid happened when Rick and I were in San Sebastian. The city is one of the stops along the Camino del Norte and the blue and yellow remind of the camino markers.
This is an 8 strand braid, with alternating chevrons in two colors. I decided to write up a tutorial so you can give it a try, too. I used a kumihimo plate, but you could use a piece of stiff cardboard with 6 slits cut on the bottom and top and a slot in the center.
Camino Kumihimo
While I have kumihimo projects on the blog, I’m thinking of this as more of a Camino craft.
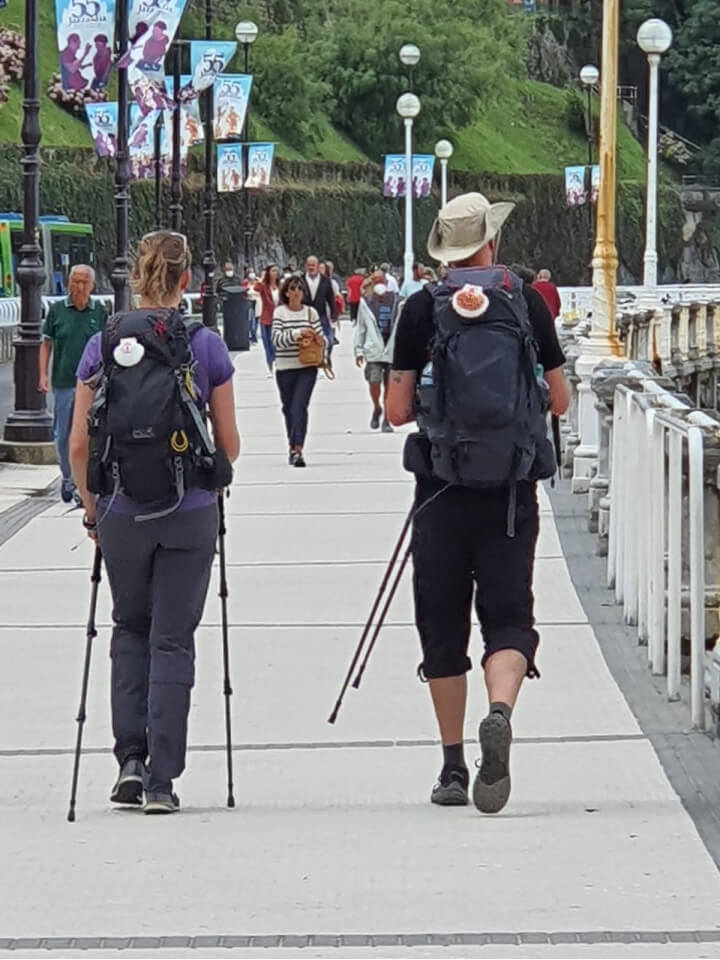
It was a pleasant surprise to run into pilgrims in San Sebastian despite the difficulties of travelling during COVID-19. The Camino Del Norte travels along the Cantabrian Sea to Ribadeo in Galicia where it begins to turn towards Santiago de Compostela, the end of the pilgrimage.
I was reminded of my last Camino in 2017 when I made backpack charms to hang from my pack. While catching the train back home I met a young American man who’d spent 2 weeks walking as far as he could before he had to go back to work. I gave him one of the charms to remind him to come back and finish the Way.
The cord I used for that project was still in my stash. It seemed appropriate to use it for the chevron braid bracelet. Here’s how I made it.
Materials and Equipment
- round or square kumihimo disk
- 2 mm cord in 2 colors (I used a satin rat tail cord. It comes in a variety of vibrant colors)
- 4 cords in yellow
- 4 cords in blue
- needle and thread
- glue (I like E6000)
- toothpicks
- scrap paper
- jewelry findings (I used ribbon ends with a lobster clasp)
- needle nosed pliers
To measure the cord, loosely wrap a length around your wrist three or four times and measure the length. This should give you plenty of cord to make a bracelet. If you want to make something else, the rule of thumb is to measure the cords to be 2 to 3 times the finished length.
It’s better to have extra cord because with this type of project you can’t add to the length of the cord. You’ll need 8 cords of the desired length, 4 blue, 4 yellow.
Tie the 8 cords into a simple overhand knot and drop the knot through the hole.
Arrange the cords so each cord is in a slot, with one color on top and the other on the bottom.
Move the two cords on the left hand side over one slot to the left.
Move the two cords on the right hand side over one slot to the right.
There will be 2 empty slots in the center.
Now we’re ready to make the chevron braid
I’m left handed, so I usually work from left to right. If it’s more comfortable for you to work from right to left, feel free. The braid will be the same. You’ll get the best results if you are consistent, though.
Imagine a line dividing the braiding plate into LEFT and RIGHT sides.
Until Steps 4 & 5, you will always move the cords from top to bottom (or bottom to top) on the same side of the line. Since this is a flat braid, you don’t have to turn the kumihimo disk.
Remove the bottom left hand cord closest to the center and place it in the open slot closest to the center on the top left.
Repeat on the right hand side.
There are now two empty slots in the center on the bottom.
Working our way from the center out, take the next cord from the top left side and move it to the empty slot on the bottom left.
Repeat for the right hand side.
Note the position of the empty slots.
Again, working from the center outwards, move the next cord from the bottom left to the empty slot on the top left.
Repeat for the right hand side.
Note all the cords from the bottom are now at the top.
The next two steps will form the chevron shape.
Move the left most cord from the top and move it to the open slot on the right hand side.
Give the cord a gentle tug (not too hard) to tighten things up.
Repeat the process on the right hand side, again giving a little tug.
Notice the two colors have changed places.
Move the top cords over one slot to the left or right.
Take the time to smooth things out and readjust the braid if needed.
Now you’re ready to repeat the steps until you braid is long enough to fit loosely around your wrist.
When you’ve reached the desired length, remove the braid from the plate and use an overhand knot to secure the loose ends. I like to make my braid a couple inches longer than the finished piece so I don’t have to untie my knots.
The reverse braid is also attractive, in my opinion.
This post demonstrates how secure the ends with needle and thread and glue the findings in place. Remember to let the glue fully cure for 24 hours before wearing your chevron braid bracelet.
Who knows what adventures will follow when you wear a snazzy chevron braid bracelet!