Easy Folded Fabric Ornaments
Use your holiday fabric to make these easy folded fabric ornaments for your tree or to attach to gifts.
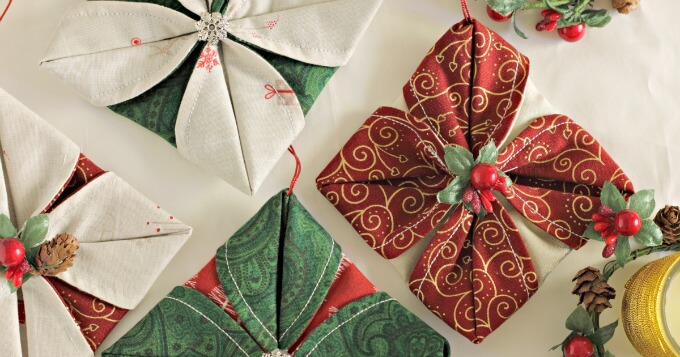
I used several 1/4 yard pieces of fabric to make these pretty ornaments. The fabric was cut across the width of the material which made it easy to cut several pattern pieces from the same piece of fabric.
These are a good project to make with children old enough to handle a sewing machine with supervision. They could also be stitched by hand. Instead of cutting on the tracing line, cut about 1/4 inch outside it and use the line to guide the stitches.
To make folded fabric ornaments you’ll need:
- holiday themed fabric, solids or prints. A small pattern is a better choice as a large, bold one will get lost in the folding. For each ornament you’ll want a dark and a light fabric.
- matching thread (I went with the white that was already in my machine and wish I took the time to swap it out.)
- scissors
- pencil
- bowl or other round object to trace about 7 inches (18cm) in diameter
- sewing machine or needle if sewing by hand
- glue
- notions to cover the center (buttons, florals, lace, bead caps, rounds of felt)
- cord for hanging
- tapestry needle
How to make folded fabric ornaments:
I’m afraid I got caught up in the project and didn’t take enough photos to illustrate the process so rather than trying to explain, I’m going to embed the video I followed.
There’s a couple things I’d like to add to the instructions from the video. First, be as precise as you can when cutting out the fabric and sewing around the perimeter. You may want to clip the seam before turning the circles inside out. I got better results on the ornaments where I was more particular about the process.
I also pressed my fabric circles before stitching them into the “crab rangoon” shape and again after turning the corners to form the ornament.


These are beautiful. I’m a little afraid of my sewing machine, but I think I will try this!
Take your time and you’ll be surprised! Good luck 🙂