
A Bunny Embroidery Project
Last Updated on March 15, 2020 by lydiaf1963
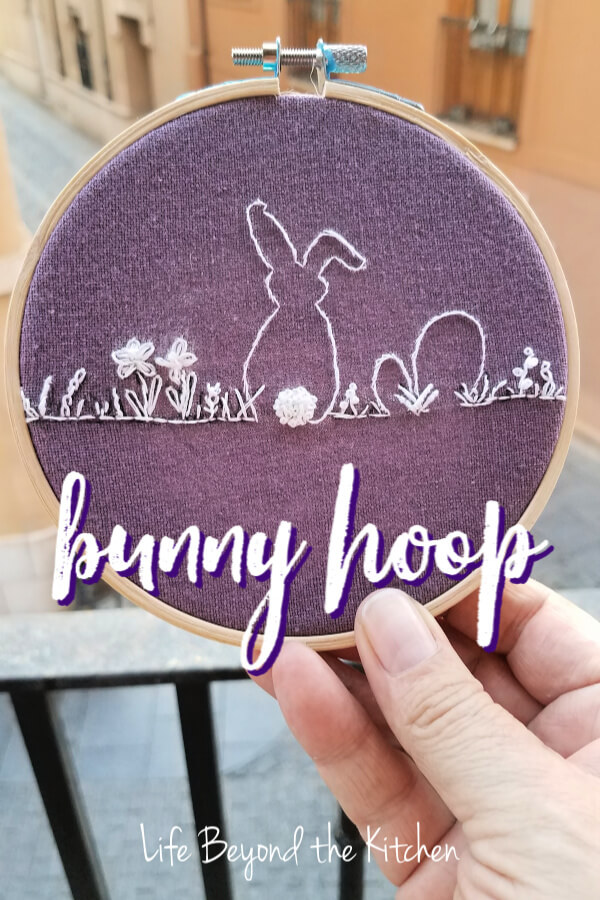
It was so much fun working on this Bunny Embroidery Project for the monthly Creative Crafter’s Group Challenge. I wanted an uncomplicated project and this one fit the bill.
Do the Bunny Hoop
This continuous line bunny themed image by Karen Kasper caught my eye when I was searching for a design for my embroidery project. I love the bent ear! You can purchase it on Dreamstime and several other places on the internet.
After buying and downloading the image I went through my stash of fabrics to see if I had any that were appropriate. A purple napkin with a tight weave suited me. I like the white embroidery on the colored background.
Next, I printed out the image and used it to determine where I wanted to place the design within the hoop. I bought two hoops for the project. The larger one served as my working hoop and the complete bunny embroidery was framed within the smaller of the two.
Working on the Project
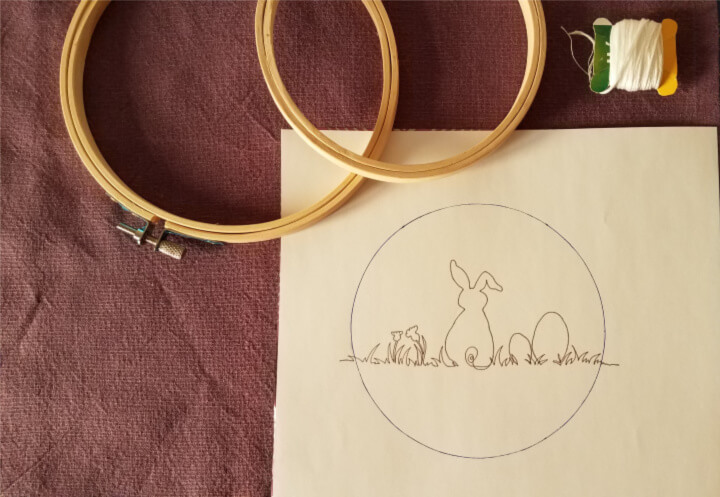
My first surprise: the transfer paper did not play well with the fabric. I ended up tracing the design by using my window as a light box the same way I did to make the applique skull shirt. A white fabric pencil worked well for tracing.
The bunny and the eggs were outlined in stem stitch with a single strand of DMC White and his tail was filled with french knots. For the grass and the flowers I used two strands and ad libbed the stitches. There’s chain stitch, feather stitch, daisy stitch, bullion stitch and back stitch.
My second surprise: the white fabric pencil smudged as I worked. It became necessary to use a fine black pen to redo the grass. It helped to use a brush to get rid of as much of the pencil as I could but I didn’t wash the project because I was afraid the ink would bleed.
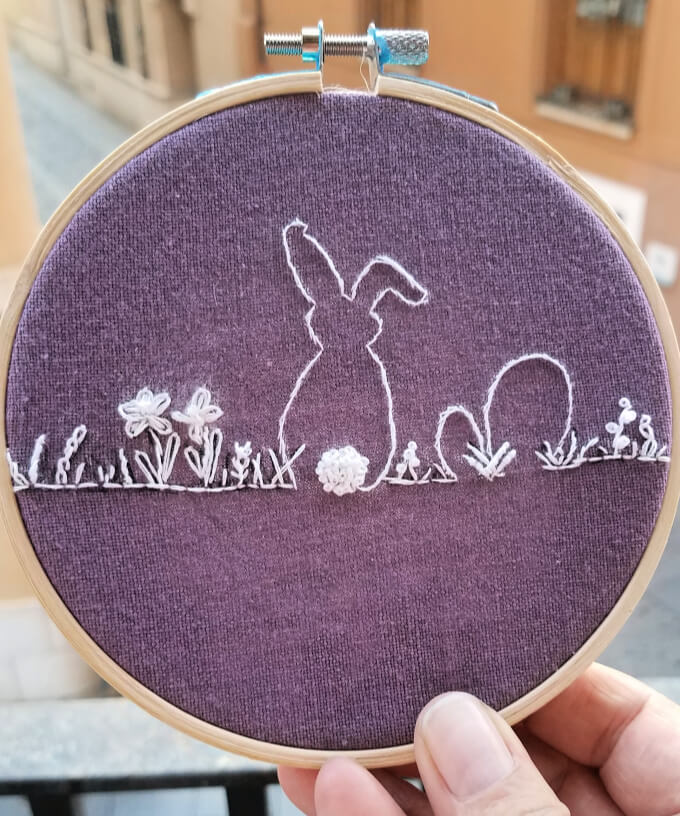
As you can see, I changed the flowers and the grass to suit my fancy. I couldn’t get the flowers to look the way I wanted so I changed the stitch. And I thought plain blades of grass were kind of boring. A natural field has a variety of grasses and small flowers.
Final touches
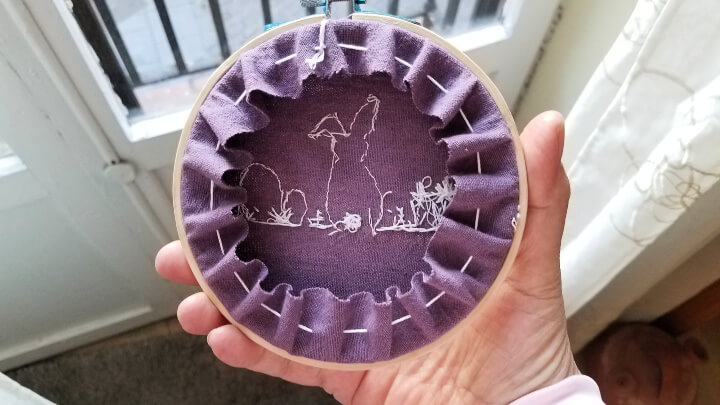
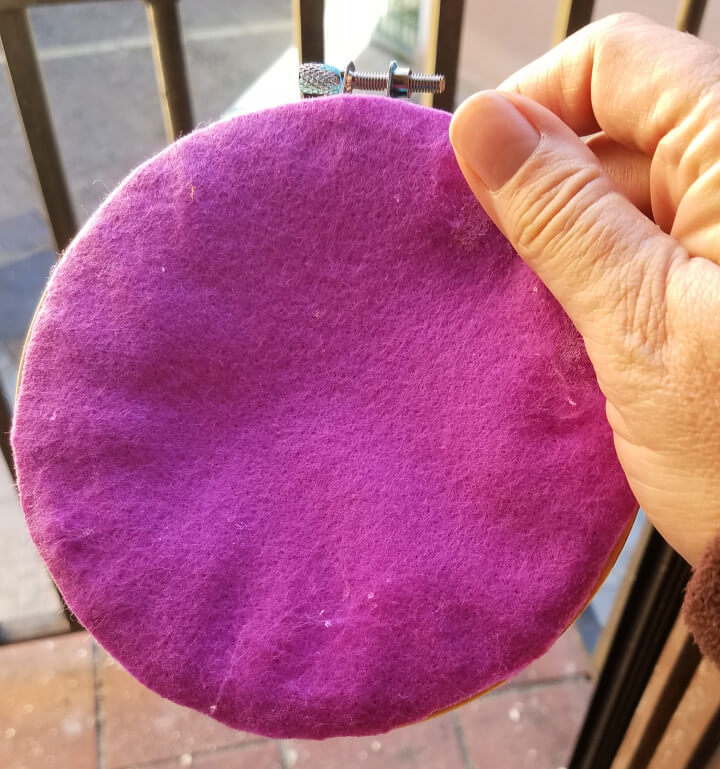
To finish my project I traced around the hoop on the back of my work and also on a piece of felt. Then I sewed a running stitch about an inch away from the line using 6 strands of thread. Pulling the stitches tight draws the fabric in as well. All that’s left to do is tie a knot in the thread to secure the fabric (a drop of glue will help hold the knot), cut the backing circle out of the felt and glue it to the back of the hoop, and hang!
I had set embroidery aside for over 20 years until my blackwork heart project. It’s been even longer since I’ve worked any of the stitches in my bunny embroidery. Naturally, there’s plenty of room for improvement but I’m pleased with how it turned out. In fact, I’m already planning my next project!
This post is part of a monthly challenge hosted by the Creative Crafter’s Group on Facebook. Each month we make something that’s our interpretation of the current theme. You’re welcome to join us!


This is too cute, Lydia! And of course I love that it’s purple!
Thanks Gail! I’m happy with how it turned out.