
Making A Polymer Clay Medallion
Last Updated on May 30, 2020 by lydiaf1963
My experience making a polymer clay medallion was an adventure because where I started out was very different from where I ended up.
The adventure begins…
This month’s Pinterest Challenge was to focus on one of our Spring themed pins, especially those related to Easter or gardening. I thought it would be cool to use the polymer clay in my stash to make some cute garden markers like these:
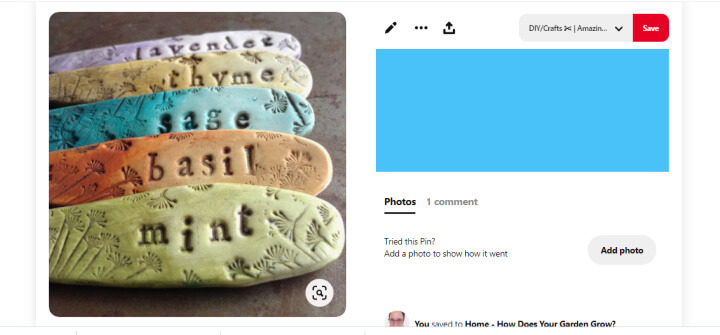
I love the colors and the way stamps were used to make impressions in the surface. But hey, what’s this? The photo really doesn’t have anything to do with the link? No way! That never happens on Pinterest!
Turns out is wasn’t really important because I only had a couple small blocks of polymer clay, not enough to make a set of markers. (It would have been smarter to check how much clay I actually had before ordering a set of stamps…oops)
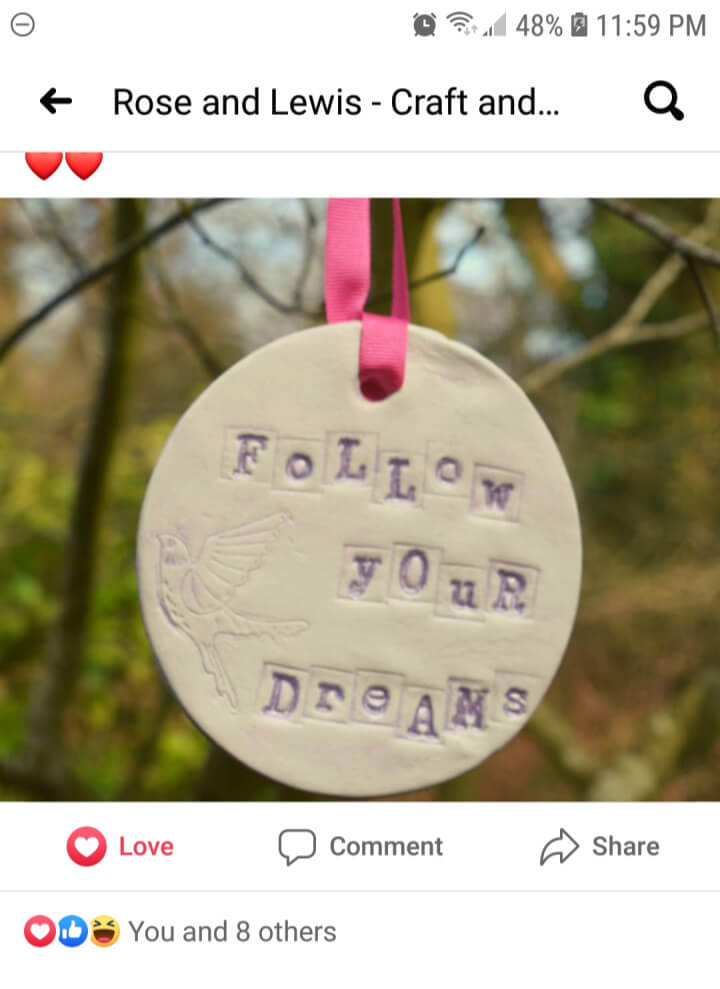
I was about to turn my attention to another garden project when the photo above rolled across my facebook feed. So the idea of the polymer clay medallion was born out of combination of the two projects.
Choosing a theme
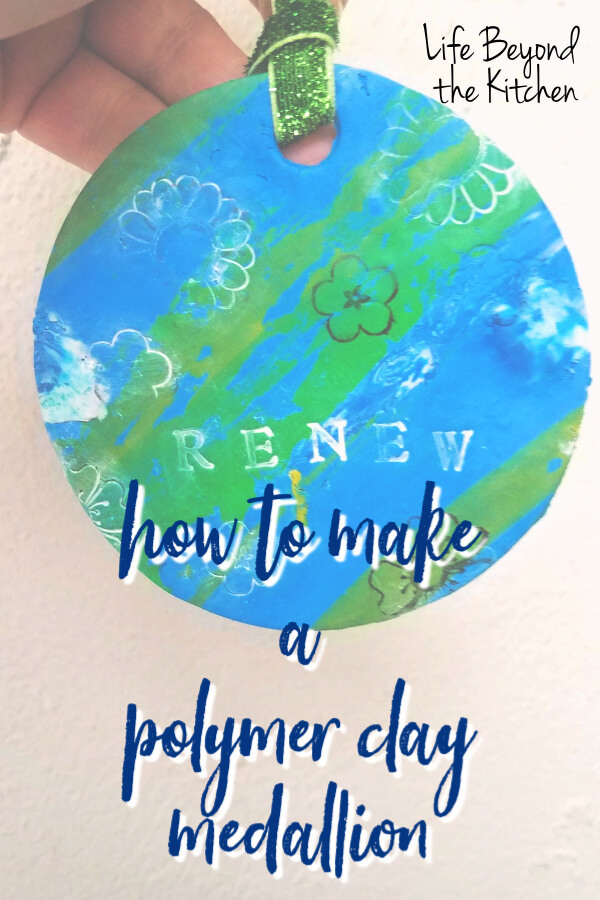
I felt this would be a good project to tie in with my word of the year, RENEW. With that in mind I picked the liturgical colors of blue, white and green to make my medallion.
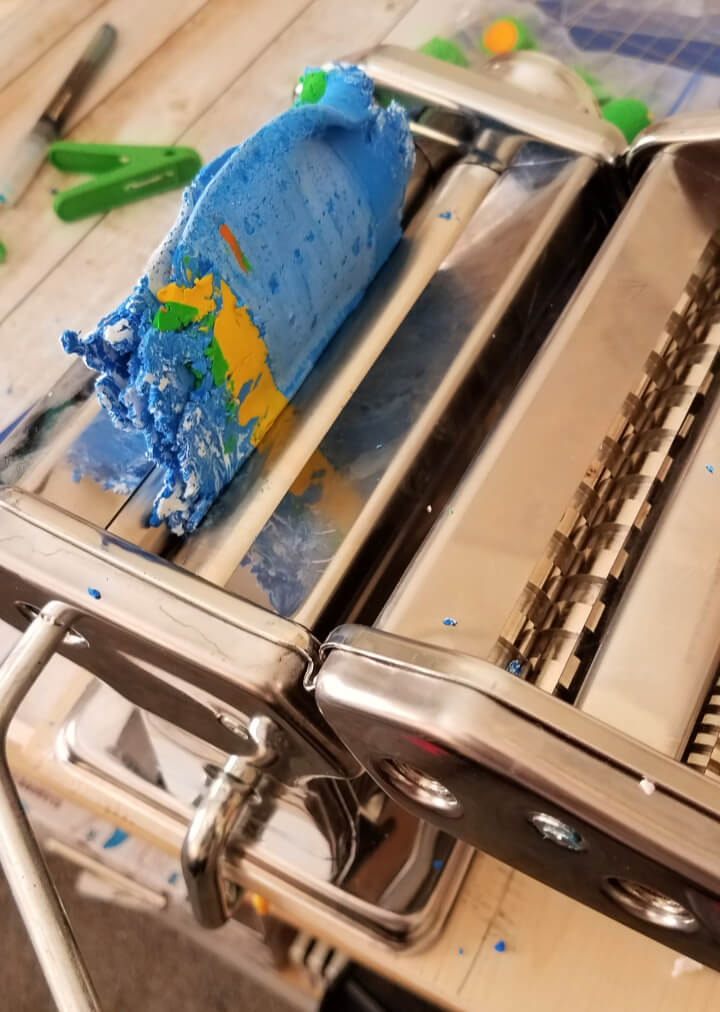
Now, I mentioned I had polymer clay in my stash. The last time I used it was to make crochet hook handles over a year ago. Shortly after that experience I bought a pasta machine on sale to make working the clay easier, but until this challenge I hadn’t found a project I wanted to do badly enough to bring out the pasta machine. #craftinglife amirite?
The clay was very crumbly due to its age but I persisted and was eventually able to roll out enough to cut out a medallion from the colors I’d chosen.
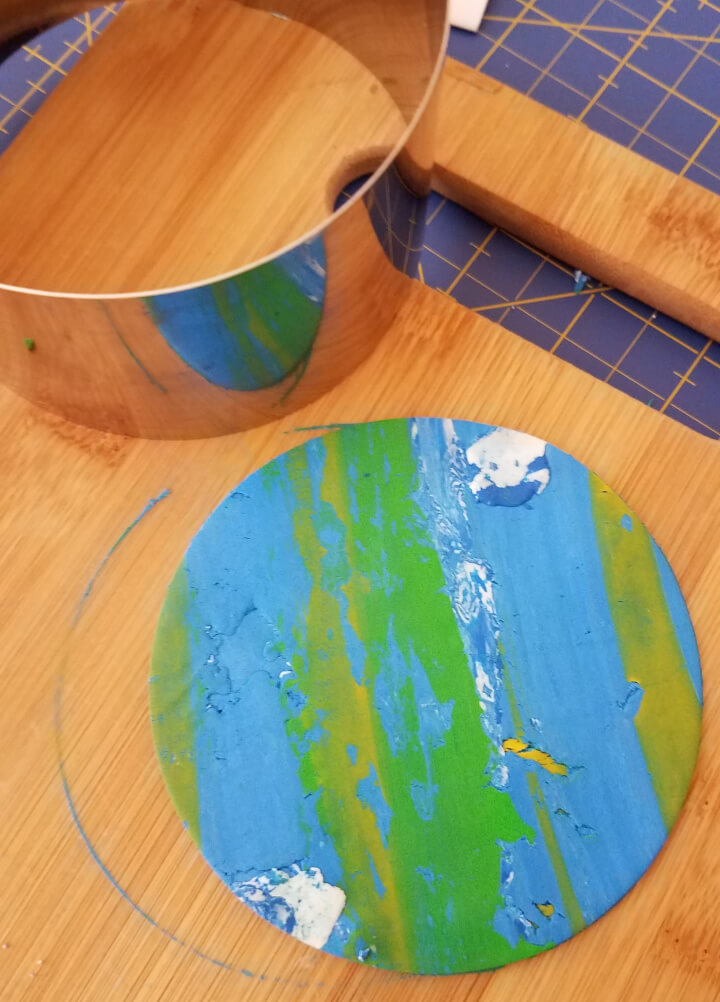
A 4 inch (10cm)kitchen mold made a good cutter. Did I mention the blue clay transferred color everywhere? Fortunately soap and water took care of 95% of it. Next I traced a couple copies of the mold onto paper so I could practice my design.
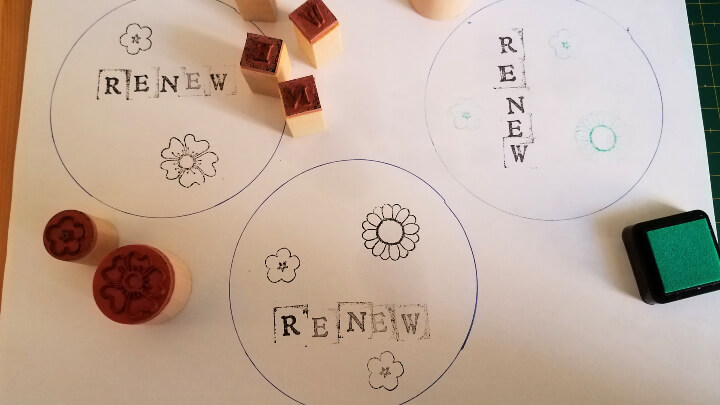
Once I had a design that appealed to me, I replicated it onto the medallion and added a few more stamps for good measure. In hindsight, I’m not sure using inked stamps was a good idea, and I wish I’d pressed them more firmly into the clay for reasons I’ll explain in a bit.
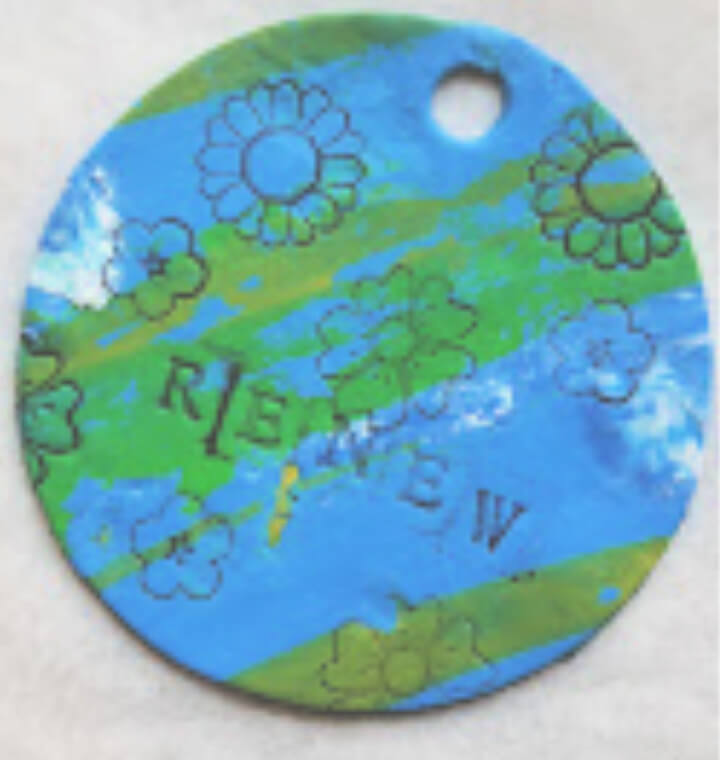
The next step was to punch a hole for hanging with a straw, then bake the clay medallion in the oven according to the package directions. When I took it out I could see there would need to be changes. It was difficult to read the dark stamped letters.
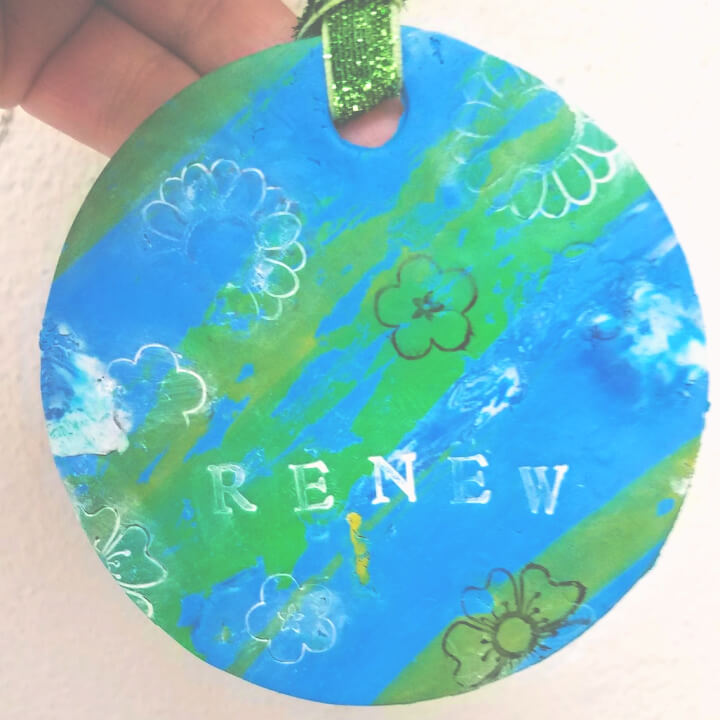
My solution was to use some acetone to remove the ink and replace it with white paint. Here’s where I learned I should have pressed the stamps more firmly into the clay. It was hard to remove the paint from around the impressions without also removing the paint in the areas I wanted to preserve it. I will remember that for future projects.
Final thoughts on my medallion adventure
Eventually it all worked out and I decided to go ahead and add a couple of stamped flowers just to add some contrast. It doesn’t show well in the photo, but you can see the outline of a couple unfilled stamps up close.
I plan to hang the the finished project somewhere in the park and walk away. Maybe it will be a blessing to someone.
Working with polymer clay is interesting enough that I’d like to explore some more, but I think I’ll wait until we’re back in the US this summer so I can more easily purchase supplies. In the meantime, I have other things in my stash to work with, and plenty of pins for inspiration.
As mentioned, this project was part of a Pinterest challenge. I’ve been having a great time trying new things and using up materials from my stash. You’re welcome to join us…sign up at the link below.
TO JOIN NEXT MONTH’S #PINTERESTCHALLENGE, CLICK HERE TO SIGN-UP ⇒ April Pinterest Challenge
For more Pinterest inspired projects from this month’s Pinterest Challenge hosts, check out the links below ↓
 My Pinterventures • Domestic Deadline • Across the Boulevard Cookies Coffee and Crafts • Farm Girl Reformed • Slices of Life Decorate and More with Tip • Purple Hues and Me • My Family Thyme Intelligent Domestications • Sew Crafty Crochet Life Beyond Kitchen • Doodle T and Me Modern on Monticello • Sum of their Stories • Our Good Life Once Upon A Time & Happily Ever After • EyeLoveKnots Create with Cynthia • This Autoimmune Life • DIY Vibes Mom Home Guide • Christina Faye Repurposed Stone Cottage Adventures • Teadoddles • Our Crafty Mom Now, let’s see what the other hosts have created ⇓⇓


How pretty! And what a fun idea to hang it in the park for others to see!
Don’t you just love those pins that go no where? I think your project turned out great, despite the hiccups, & I love that you’re going to leave it for someone to discover! : )
What a cute craft. This could be used on a year around tree as an ornament or a tag for a tier tray. So many ways to use those cute things. Thanks for sharing.
I often struggle with polymer clay and the projects I want to use it for. It is one medium that has often frustrated me and I’m not sure why. I am sure your medallion will make many people smile. We often come across painted rocks or hanging beaded works in the woods where we comb the trails and the kids are always so exited to see those works of art. Pinned.
What a fun and creative idea to make and leave for others! I’ve just started with a few polymer clay projects and I’m loving them! So many awesome possibilities like yours!
I never have much luck working with clay – perhaps I need a pasta machine? I think the problem is that I don’t work it enough, and make it too thick. Your piece turned out beautifully! I love the idea of the “renew”. Seems like a tranquil reminder.
That’s really pretty. It’s great to know that even older polymer clay can be worked enough to make it useable. And great tips about using the stamps on it. I like the white effect that you ended up with on the lettering. I’m sure someone will love to find this.
Love how this project turned out, especially with your word of the year!
I hope this inspires others too when they see it in the park. Good job sticking with the project until the end and not giving up.
My word for the year is “Renew” also! 🙂 I love that you are leaving this pretty blessing in the park for someone else to find. Kindness is never wasted! pinning -Marci @ Stone Cottage Adventures
This is a really cool clay project. I have a stash of polymer clay, and I’ve been looking for ways to use it up, so I’m pinning this!
I LOVE your word of the year! This turned out so cute! The stamped lettering looks great.
That turned out so pretty, and I love the word you chose!
That came out so pretty. I haven’t worked with polymer clay in years. I like how you mixed the colors and added the stamps for interest.
It’s so pretty! I never use clay, but now I want too.