
How to Knit Lace Covered Ornaments
Last Updated on November 10, 2022 by lydiaf1963
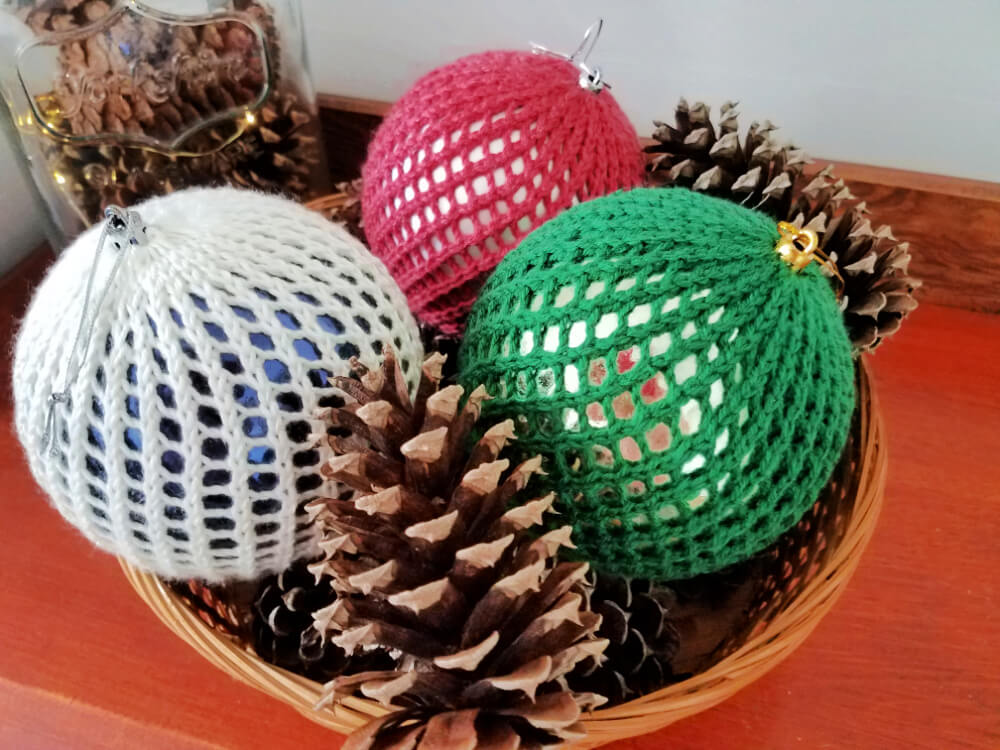
Sometime back I posted a few Red and White Knitted Ornaments including some lace covered balls that served as the inspiration for today’s post. The biggest difference is I used large globes this time instead of the standard balls. It only took a little experimentation to get a nice looking result!
What you’ll need to make Lace Covered Ornaments
Materials and Equipment:
- Sport weight yarn (I used Yarn Bee Yarntopia)
- US Size 6 (4 mm) knitting needles (I used Clover DPNs. Circulars will work, too)
- Stitch marker
- Yarn needle
- Scissors
- Large globe ornaments (I bought mine at Dollar Tree)
Skills Needed:
- Cast on
- Joining in the round (DPNs or Circulars)
- Knit (k), Purl (p)
- Knit Front and Back (kfb)
- Yarn Over (yo)
- Knit 2 Together (k2tog)
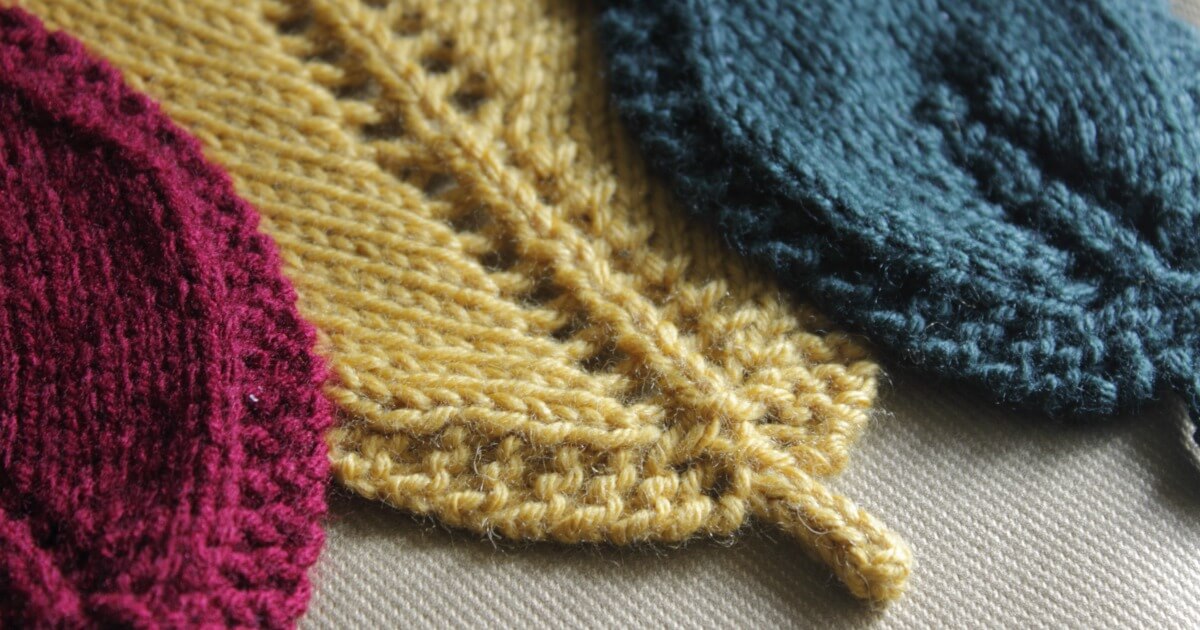
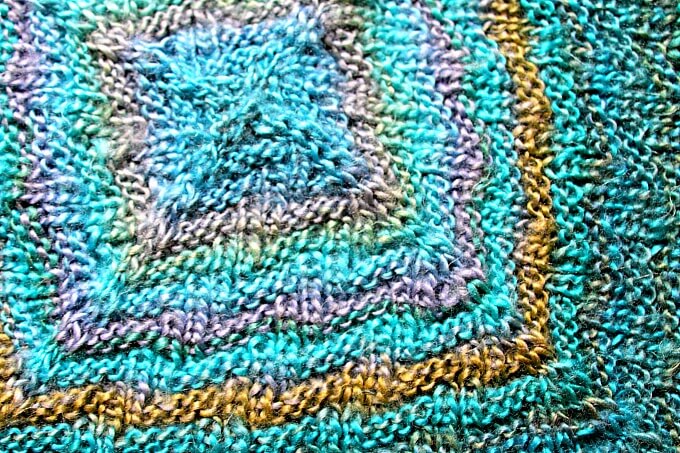
The pattern is a very simple lace composed of one round Yarn Overs and Knit Two Togethers followed by a round of knits. Once you’ve established a pattern it’s pretty mindless knitting.
Making the Lace Covered Ornament
We’re going to build a stable foundation before transferring to DPNs for knitting in the round. Rounds 1 – 5 are worked flat. We’ll transfer to the other DPNs in Round 6 and work some increases before starting the lace.
Rnd 1: Leaving a long tail, cast on 12 stitches
Rnd 2: *Knit front and back across (24 stitches)
Rnd 3: *Purl all stitches (24)
Rnd 4: *K1, KFB across (36 stitches)
Rnd 5: *Purl all stitches (36)
Rnd 6: In this round we’ll do the final increase and distribute the stitches to the other DPNs. The increase will turn groups of 3 stitches into groups of 5.
*KFB, K1, KFB* around. As you work, add in the next DPN as appropriate.
I prefer to use 4 needles and put 15 stitches on each one. If you’d rather use 3, then put 20 stitches on each.
Rnd 7: Join in the round, place a marker at the beginning, and *knit every stitch. (60 stitches)
NOTE: Before getting too far into the lace, take the time to sew up the space created by joining the work. Use the long tail from the cast on.
Rnd 8: *YO, K2Tog around. You’ll want to arrange the stitches so each needle ends with a K2Tog.
Rnd 9: *Knit all stitches
Repeat Rounds 8 and 9 about 18 times or until you can comfortably close the lace around the top. Be sure to end with a knit round.
To finish, open your knitting wide enough to slip the ornament inside. Cut the yarn about 6 inches from the work and thread onto a yarn needle. Thread the needle through all of the stitches on the DPNs, removing the needles as you go. Pull tight around the top. Knot and secure the knot with a little glue.
Enjoy your lace covered ornament!
Pattern Notes
60 stitches worked well for globes about 14.5 inches (37 cm) around. The lace is very stretchy but if your ornament is significantly larger you can try using a thicker yarn and increasing the needle size OR you can cast on more stitches. Keep your cast on to multiples of 3 and the rest of the pattern will follow even though the total number of stitches will be different.
Keeping Track of Which Round You’re On
Even experienced knitters can lose track of where they are in a pattern. Here’s a good trick for repeating 2 row patterns such as this lace:
I use two stitch markers. One a clip style and the other a ring. Attach the ring to the clippy marker. Designate the clip marker for the first round (in this case the *YO, K2Tog* repeats) and the ring marker for the plain knitting round.
Any two markers will do as long as they can be fastened together and you’re able to remember which marker represents which round. I like the clip style marker for the row I have to do something (like lace or a round of decreases) and the plain ring for the plain knit round. Whatever works for you is the best choice.
There are even special markers for tracking row repeats in complicated lace patterns, but for this pattern, any two markers you have handy will work well.

These are beautiful!