How To Improve Your Product Photography At Home For Your Blog or Online Shop
Last Updated on May 30, 2020 by lydiaf1963
I’m very sorry to tell you that Bluprint will be closing its doors in the next few months. They plan to stop accepting new subscribers and orders for individual classes, patterns and supplies on May 31, 2020.
Hopefully Jessica will be able to offer her class through another platform. If she does, I’ll update the links in the post.
You’ve just finished the project you’ve been working on and want to take a gorgeous photo of it to share with your social media friends. Or maybe you have a blog and want to create a tutorial with your project. Or perhaps you have an online shop and want to showcase your product. If the photo you take doesn’t thrill you as much as the project in real life, the odds are your project won’t get the attention it deserves. If you’re struggling to improve your project photos, I know the perfect class to help.
Product Photography at Home with Jessica Marquez will teach you everything you need to know to take gorgeous still shots of your projects without having to purchase an expensive camera or equipment.
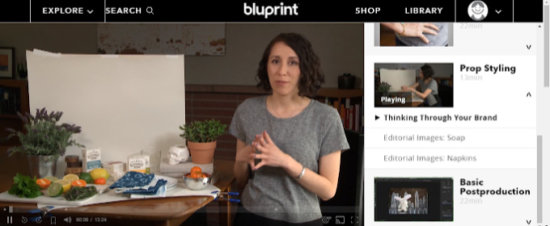
Over the course of seven HD video lessons you’ll learn:
- how shutter speed, aperture and ISO work together to capture an image
- a simple tabletop set up for showcasing your product
- how to use natural light
- prop styling
- shooting outdoors
- a simple workflow for editing your images
The class is geared towards owners of DSLR cameras but most of the lessons will also apply to those with point and shoot cameras or mobile devices.
Jessica has a soft manner to her instruction which is thorough without being quickly paced. This class is geared towards online shop owners, bloggers and crafters with an online presence. Jessica’s experience both as a professional photographer and as a fellow crafter is evident in her approach to the course.
Most classes focus on the mechanics of the camera, which is important, but the most valuable information in Product Photography at Home is found in the sections on prop styling, working with natural light (indoors and out) and how to create the tabletop set up. You’ll also get a supply list and guides for ISO, aperture and shutter speed to help you take your best shot.
I found her approach to be very different from the food photography classes I’ve taken. I was encouraged to try different camera settings and to up my prop game in order to add more interest to my project shots. I’ll admit my photos tend to be very bland and styling is something I also struggle with. For some things I can use stock photos on my blog, but obviously I can’t do that for a craft tutorial.
My personal experience has been that improving the quality of my photos has paid dividends in encouraging people to click thru to my blog post from Pinterest or Facebook. Think about it. The only time I’ll click on an unappealing photo is when there are few alternatives to choose from. The web is a competitive place and there’s no longer an excuse for an out of focus, poorly lit image taken from a strange angle. This course will help you avoid taking them.
The instructor uses Photoshop to demonstrate how to edit photos but the process she uses will apply to any photo editing software you might have. I use different software but didn’t have any trouble following what she was doing.
By the end of Product Photography at Home you will understand how to use natural light to take amazing photos of your projects to share on the web, on your blog, or in your online shop.
If you subscribe to Bluprint you can watch the class anywhere you have an internet connection. Bluprint’s online streaming platform makes it easy to navigate the various sections and you can add bookmarks to revisit portions of the video for review. Another option is to buy the class which will allow you to download a copy to your computer to watch whenever and wherever you want. I like that versatility with Bluprint’s platform. Check out my post on whether Bluprint is right for you for more information.

