
American Flag Kumihimo Braid
Last Updated on October 21, 2020 by lydiaf1963
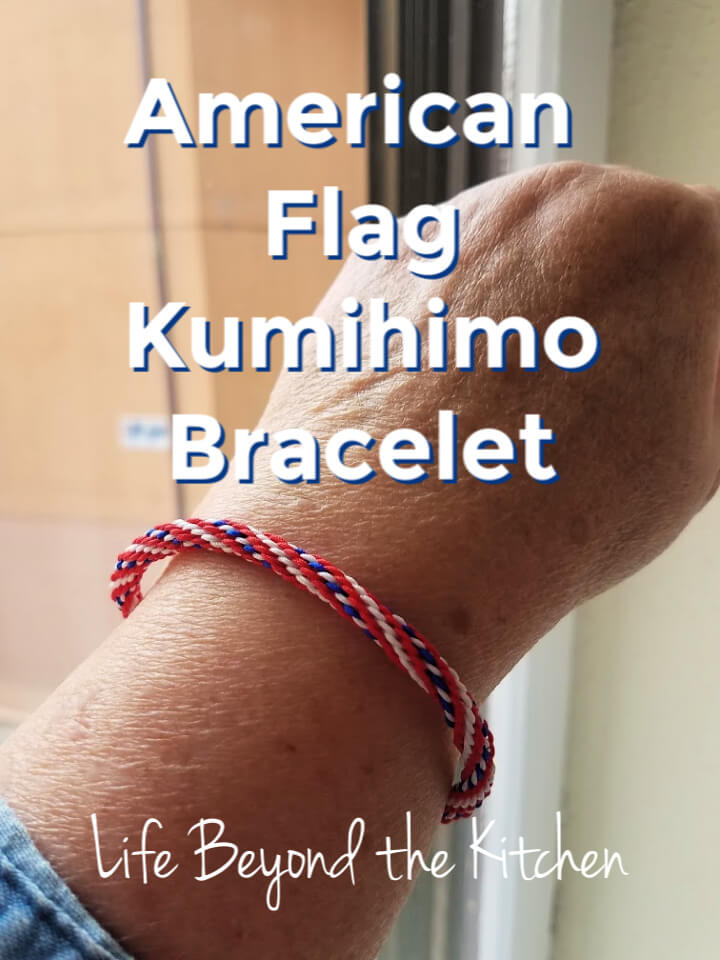
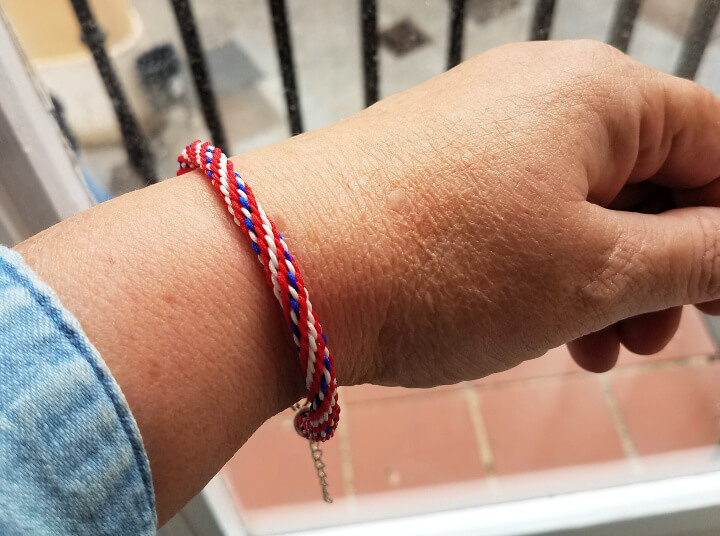
Do you have red, white and blue cord? You can make this attractive American Flag Kumihimo braid. Use it any way you like. I’ve turned mine into a bracelet, but a longer braid might look great as a replacement cord for a hat.
The anatomy of a round kumihimo braid
I have really enjoyed learning more about the fascinating craft of KUMIHIMO, the Japanese way of braiding. Last month I made a key fob and an eyeglass cord as presents for my super picky husband.
This month, I’m making something for myself and learning more about how a round kumihimo braid operates in the process. This one is a 16 cord round kumihimo braid that resembles the American flag. It’s perfect for summer and the Fourth of July.
The post I mentioned above goes into more detail about how to do basic kumihimo. For this post, I’m going to talk about the importance of the set up and how it affects your final design.

Let’s look at the set up photo above. You see 16 cords arranged in groups of four, with two strings on top, and two on the bottom. Each group of cords represents one “row” of the pattern, and the pattern is repeated one time.
When braiding, you work one set of cords completely before turning the kumihimo disk and working the next set in order to create a “row”. The “rows” spiral around each other as the braid grows in length.
The pattern for the American flag kumihimo is:
- solid red
- solid white
- solid red (these represent the stripes on the flag)
- alternating white and blue (representing the field of stars)
- Repeat
Note that this is how the kumihimo disk has been set up with solid red and white clusters and an additional cluster with alternating blue and white cords.
Once you understand how the pattern works you can begin create your own designs.
Finishing a kumihimo braid to wear as a bracelet
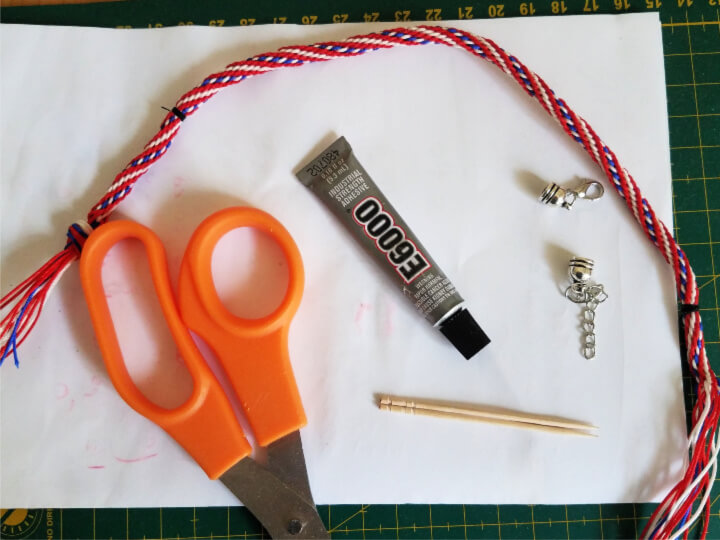
To turn your cord into an American flag kumihimo bracelet, you’ll need a few items:
- needle and thread
- bracelet end caps large enough to accomodate the diameter of the cord
- glue (I like E6000)
- toothpicks
- scissors
- completed cord

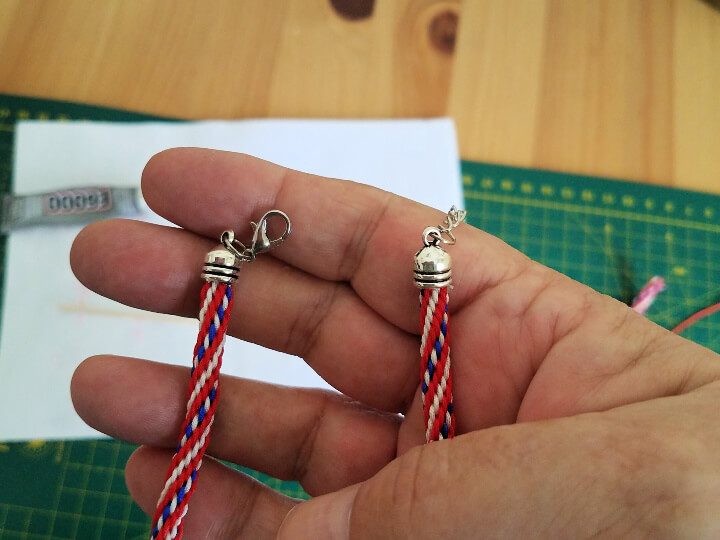
- Use the needle and thread to create a wrap around one end of the bracelet.
- Measure the appropriate length, being sure to take the size of the bracelet hardware into account. Repeat on the other end.
- Use the scissors to cut the excess braid close to the thread wrap. Use glue to secure the ends and prevent them from opening up.
- Add glue to the inside of one of the end caps. Push one of the wrapped ends into the cap and rotate it to spread the glue. Repeat on the other end.
- Allow the glue to cure completely before wearing.
I’m really pleased with how my bracelet turned out and I’m looking forward to designing my own round kumihimo braids.
As mentioned above, please see this post for a more in depth discussion on the mechanics of making the braid. There are plenty of links to good tutorials.
It’s time for the June Pin Challenge! The purpose of the Pinterest Challenge is to motivate us to not just pin, but to make it happen! This month’s challenge is Summer or Fourth of July. I used this photo pin as the source of inspiration for this month’s project.
Want to join us in the challenge? Sign up here to participate in July, 2020
For more Pinterest inspired projects from this month’s Pinterest Challenge hosts, check out the links below ↓

My Pinterventures • Across the Boulevard
Cookies Coffee and Crafts • Farm Girl Reformed • Slices of Life
Decorate and More with Tip • Purple Hues and Me
Life Beyond Kitchen • Created Homemade • Domestic Deadline
Mom Home Guide • Sum of their Stories • Create with Cynthia
Now, let’s see what the other hosts have created ⇓⇓


I love doing simple braiding – I think I’ve done six strands, max! Not sure if I can do sixteen, though. Your bracelet looks amazing! What a unique and versatile technique! And I would love to see how you design your own braid in the future!
The bracelet looks so cute. I love your tutorial. Happy July 4th!
That is such a cute bracelet and just perfect for the 4th. Pinned.
I’ve never seen this Japanese braid technique. Looks like a fun craft to try. Pinned.
Your bracelet looks great! What a fun way piece to wear for the 4th.
That’s lovely, what a beautiful techinque.
What a pretty bracelet. Those style of bracelets are so cool.